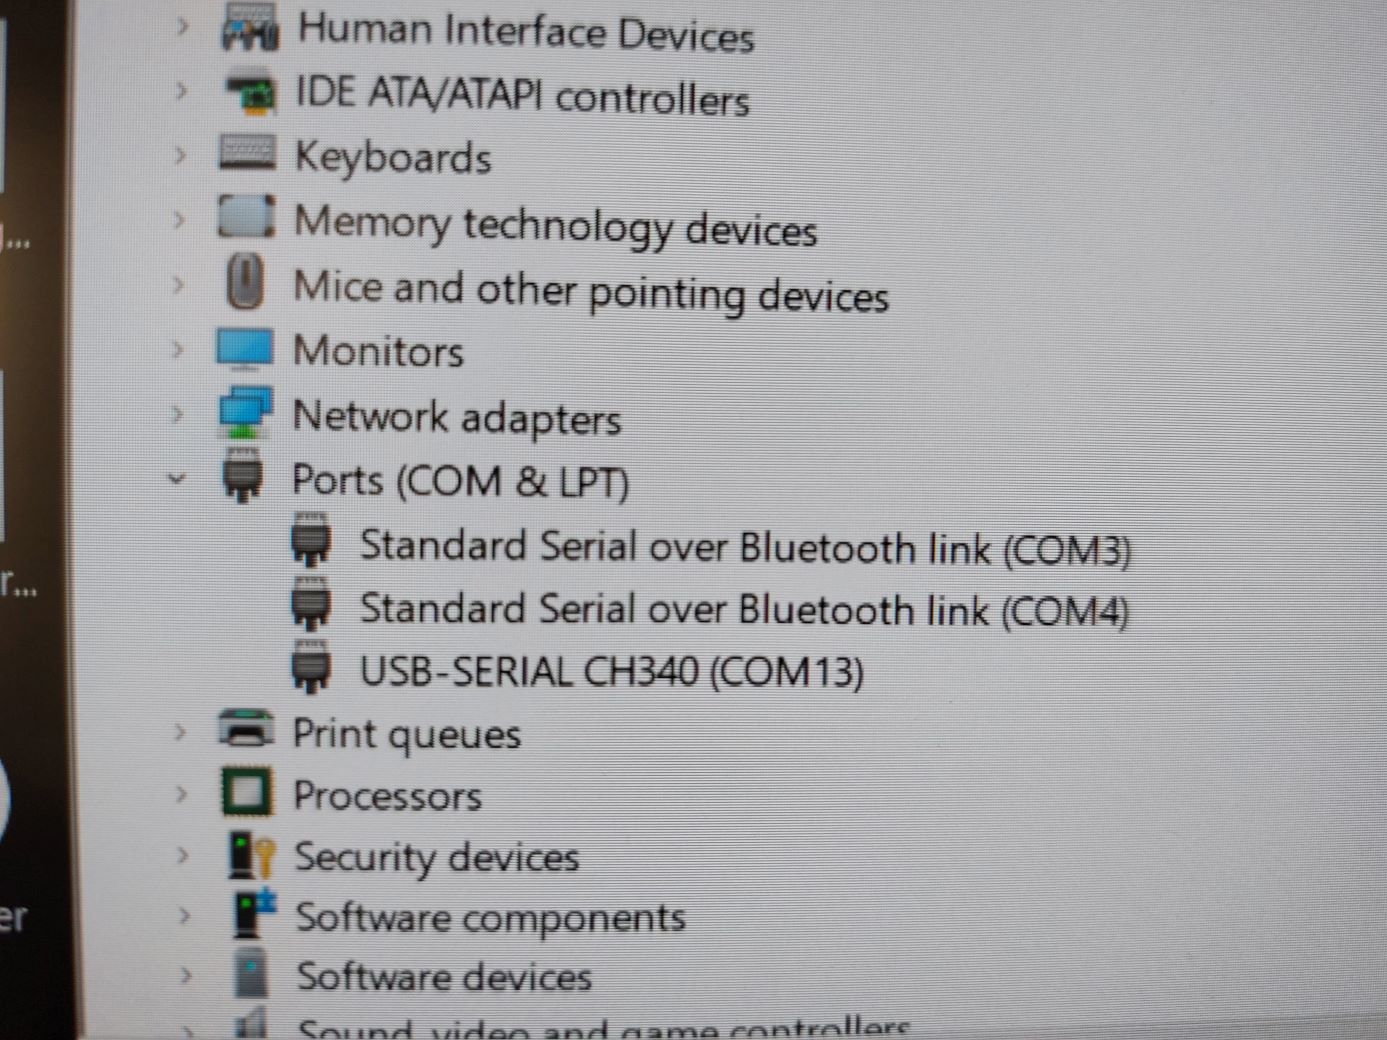
Electronics The reason your CH340 based arduino stopped working I've been using cloned Arduinos for years now. And never had any problems with them, until this week.I ordered three cloned Arduino nano's to build an U
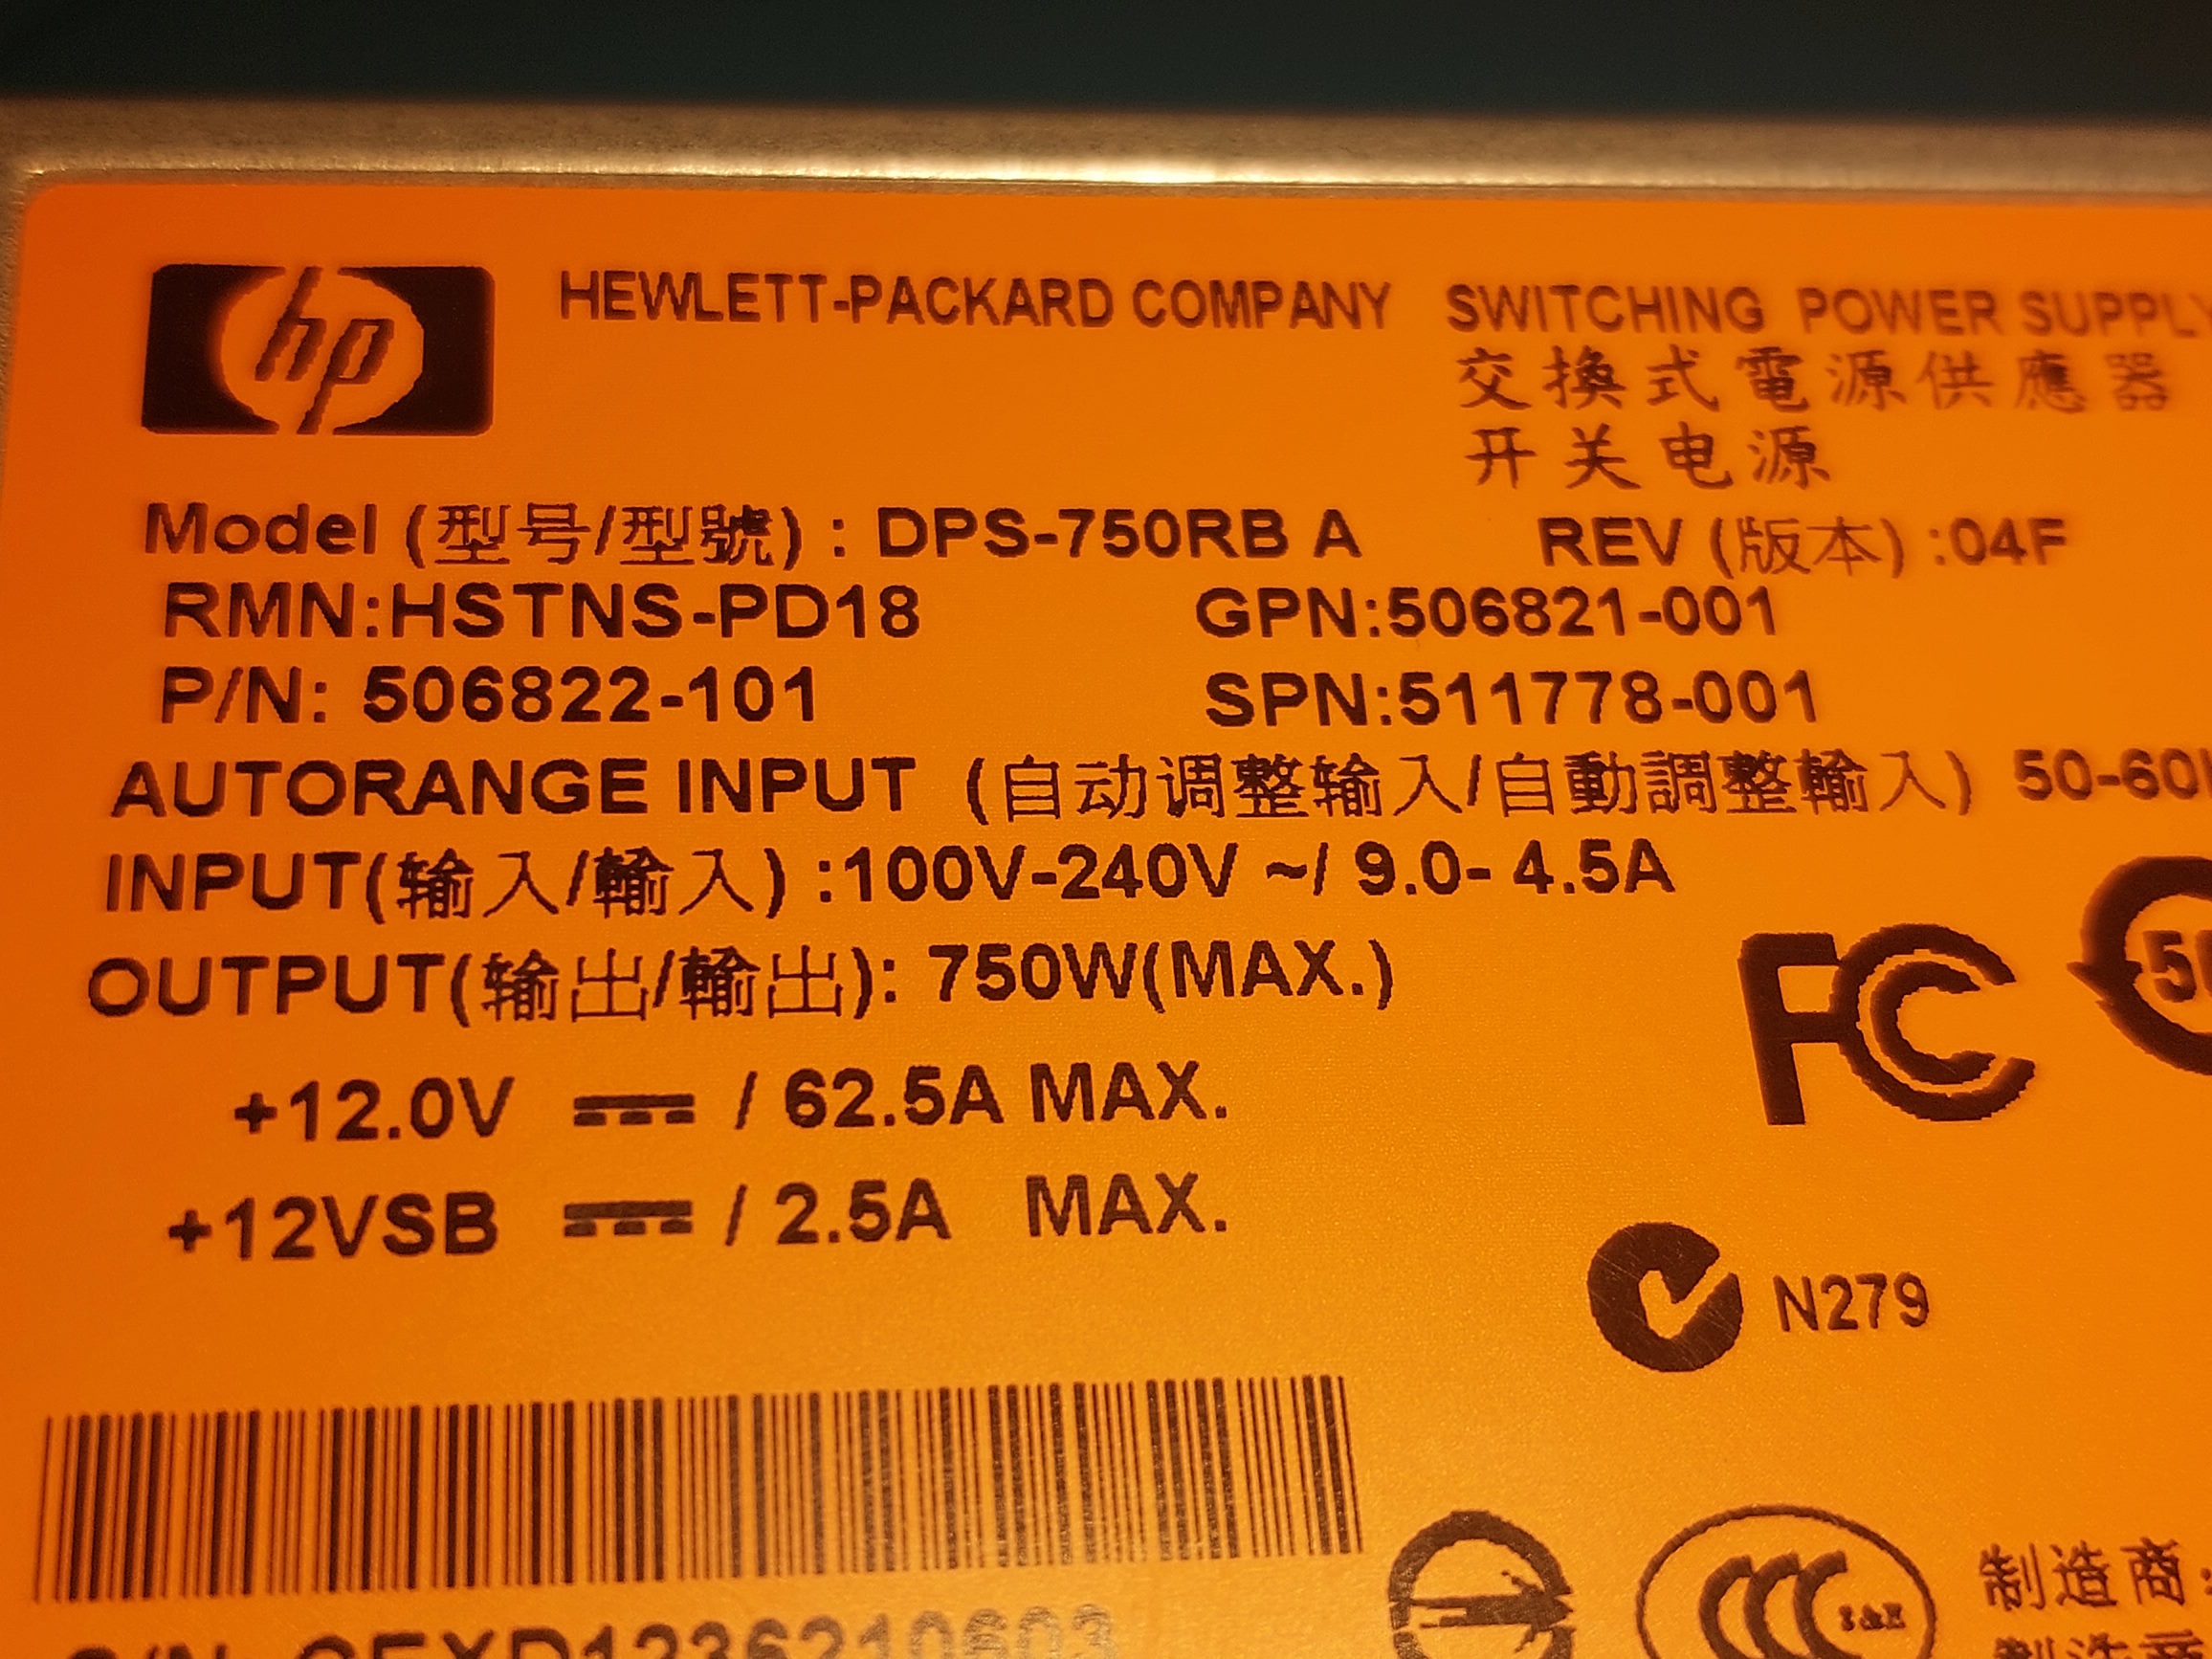
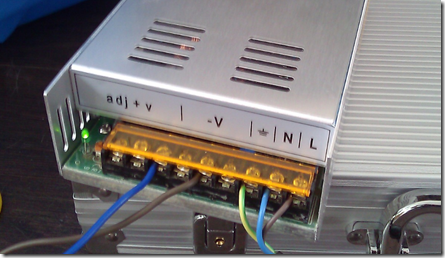
Electronics Isolating the HSTNS-PD18 negative/ground from earth/chassis I've bought 4 HP HSTNS-PD18 (aka DPS-750RB) server power supplies to build one big 48V 3kWh powersupply. The PD18 is 12V by default.By default the negat
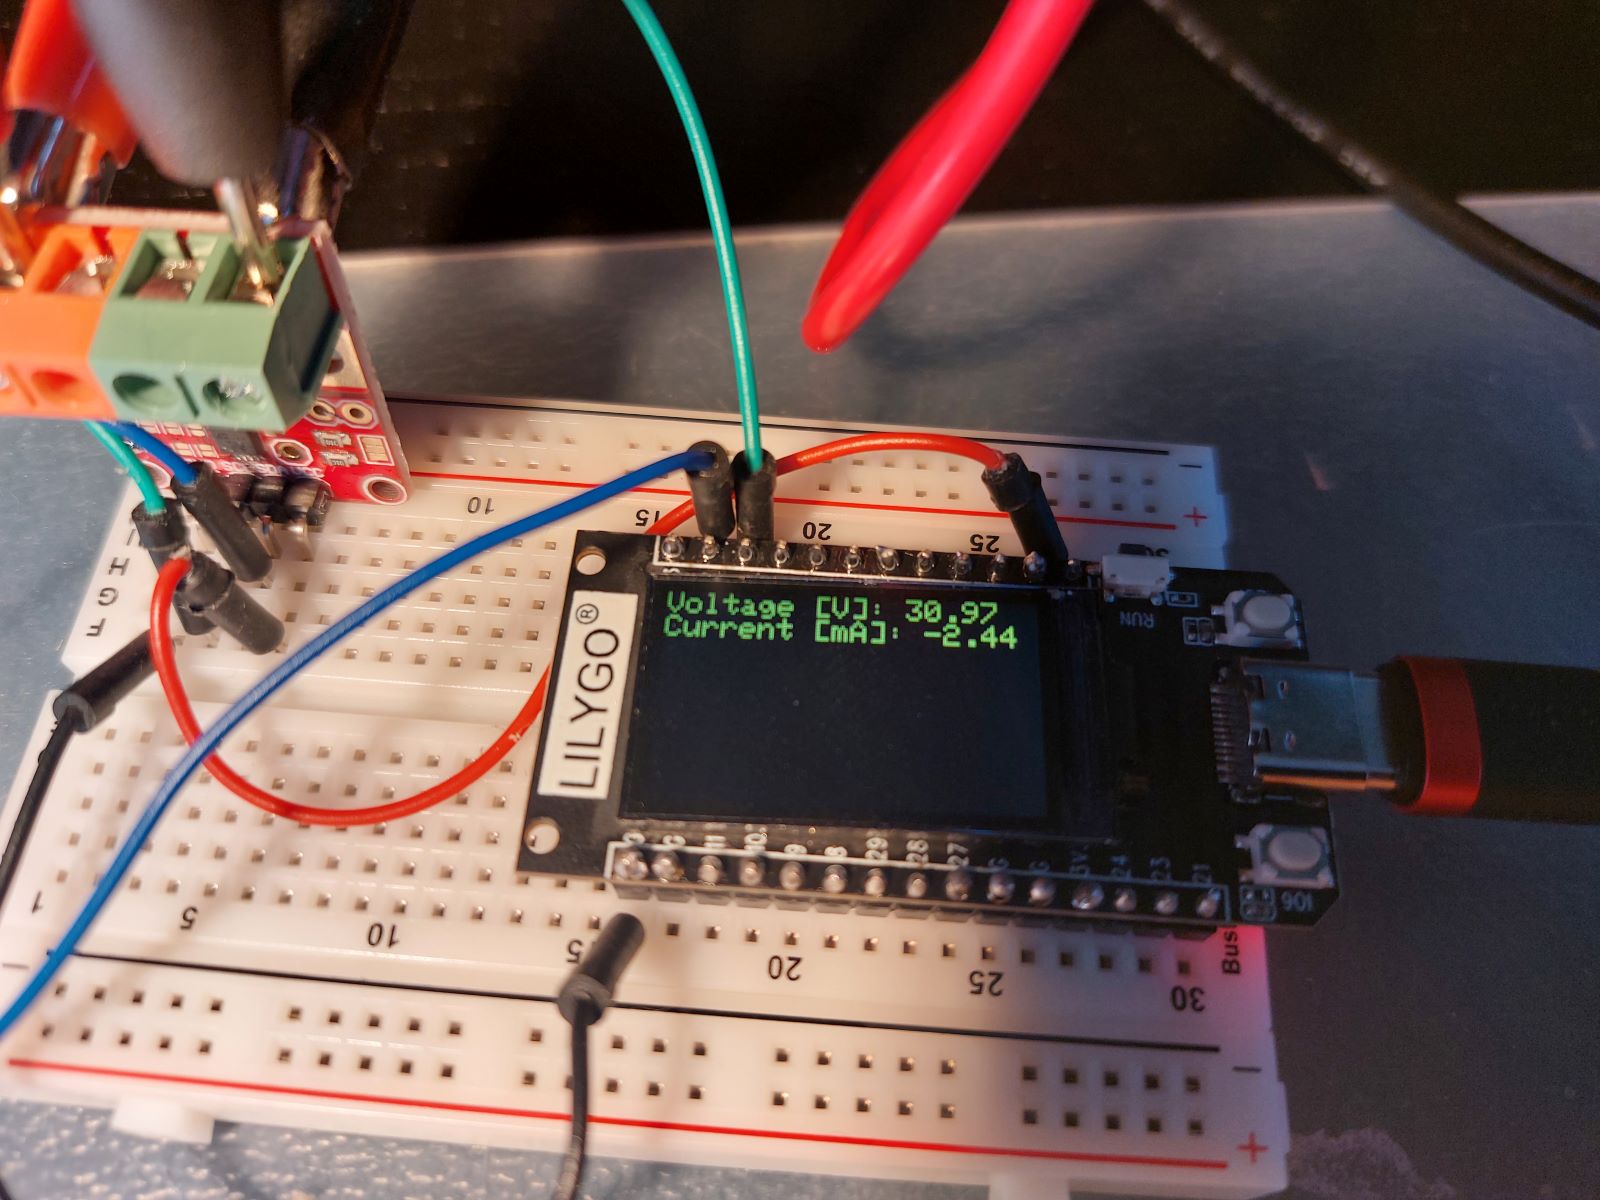
Electronics Accurate (high) voltage measurement on a RP2040 with display For my application I need an accurate voltage measurement up to 36V.And I also I want to upload those measurements to a server via WIFI. I've bought a R
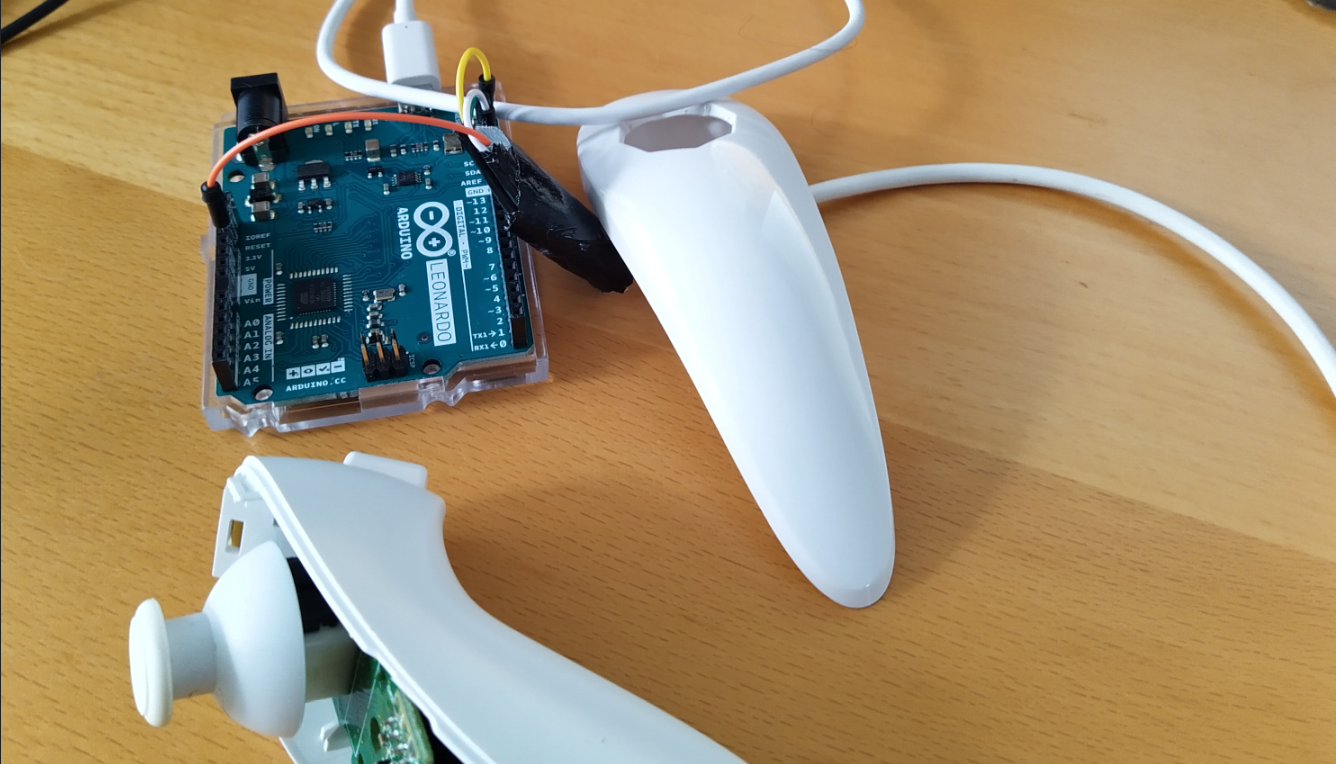
Electronics Wii Nunchuck WASD controller for COD Warzone I've not played computer games for at least the last 20 years. I recently bought a nVidia GeForce GTX 1660 Super videocard to stop Fusion360 from whinin
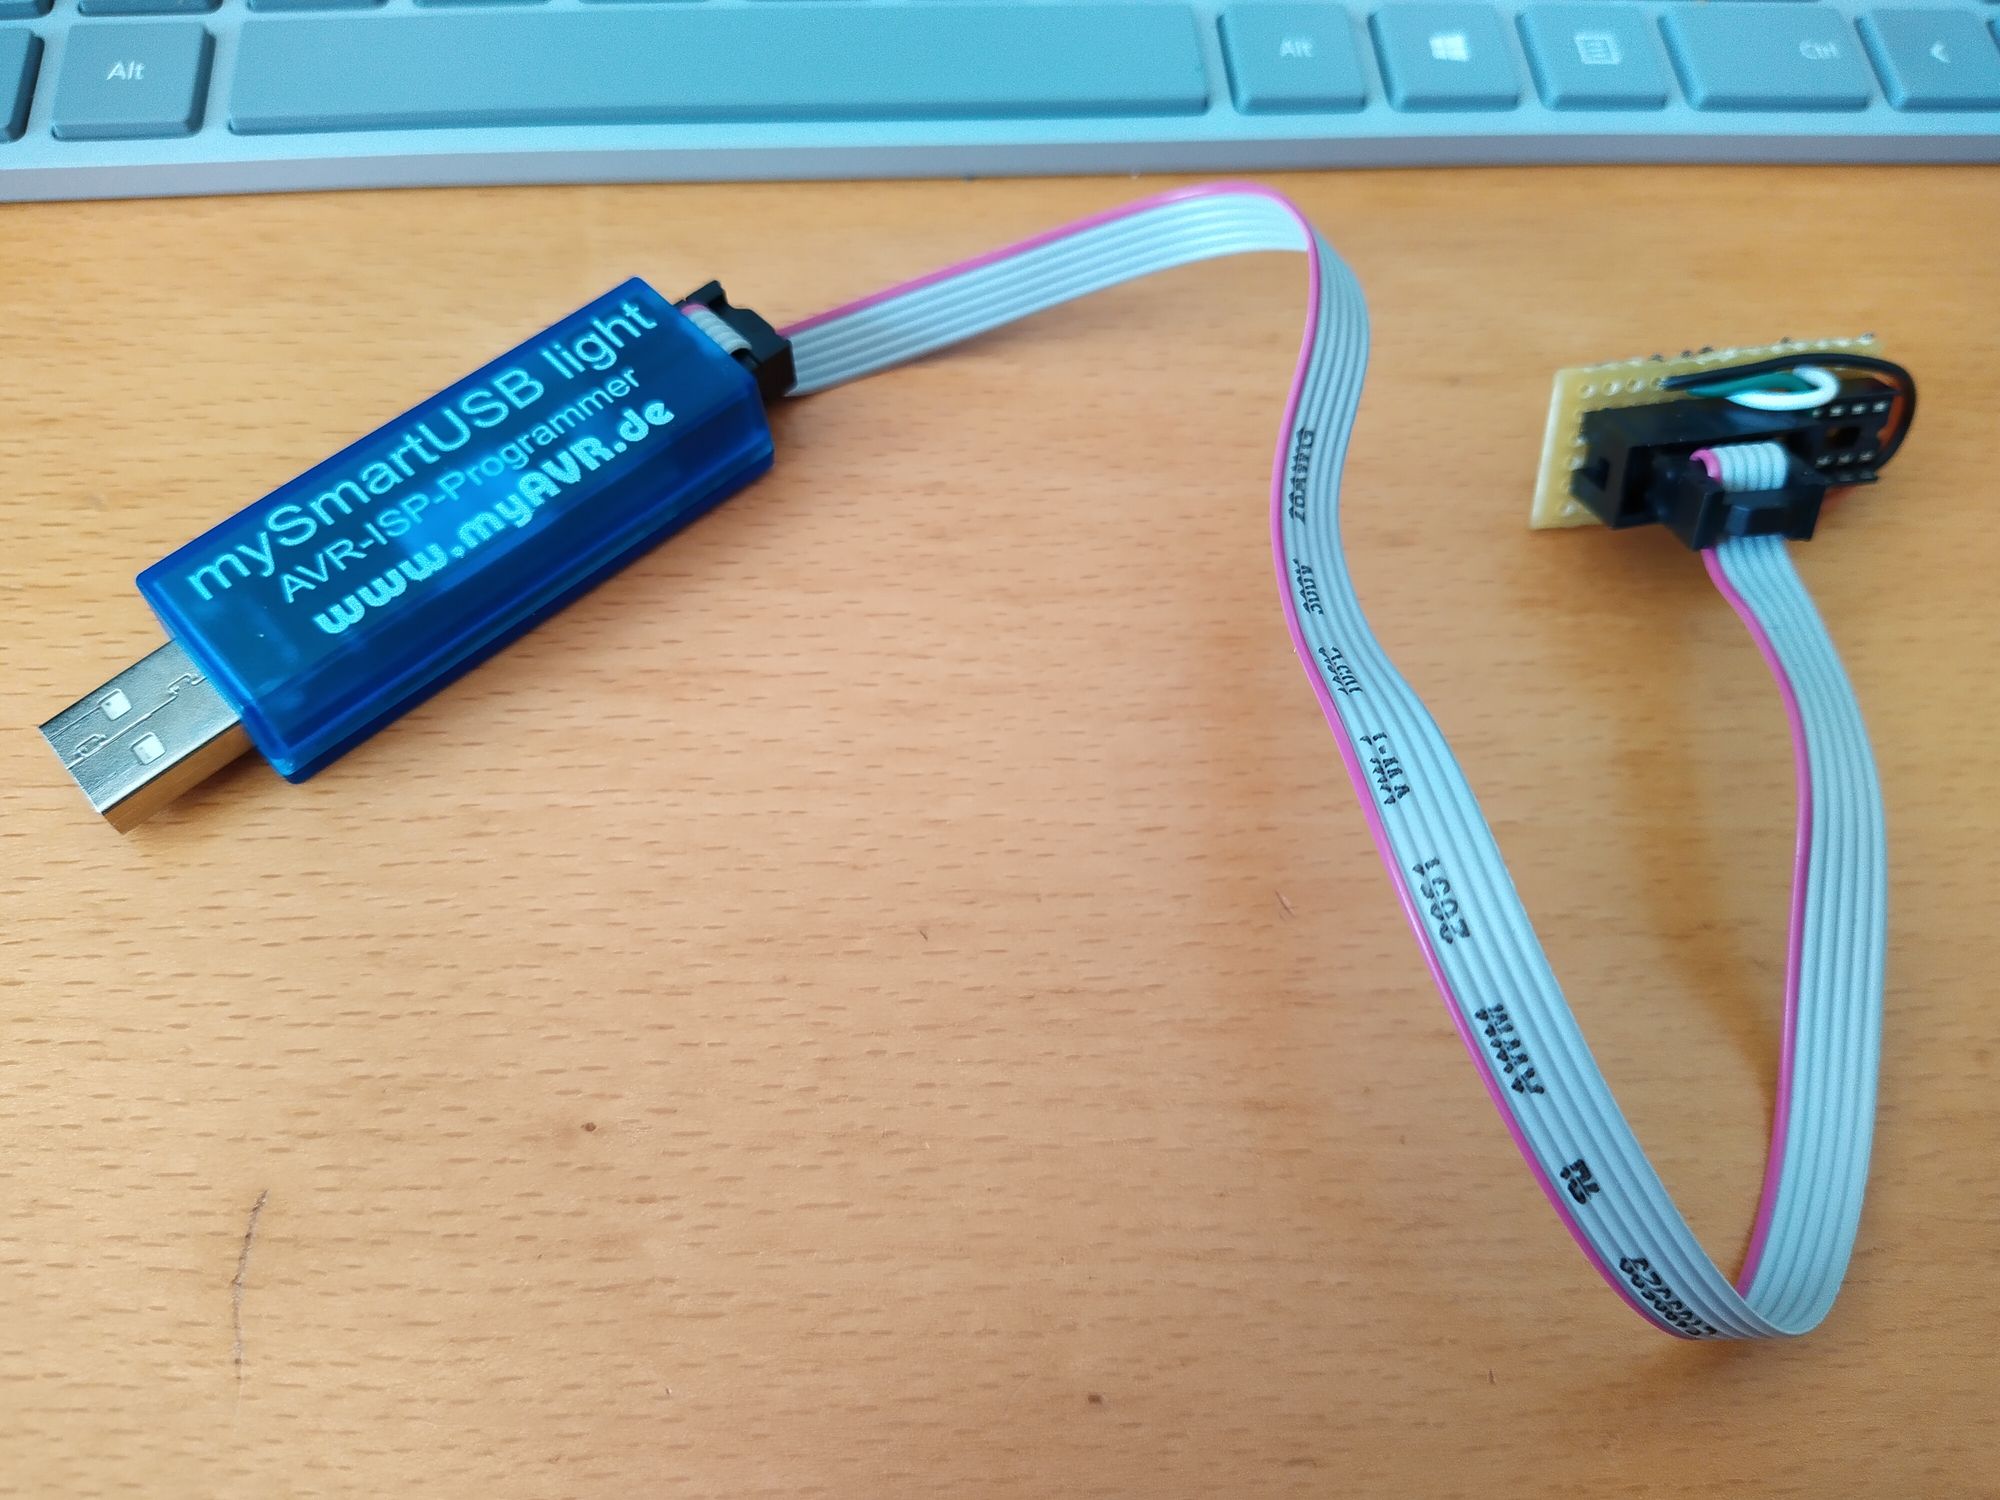
Electronics Programming ATTINY85 with mySmartUSB light from Arduino IDE The other day I was trying to program a ATTINY85 with a mySmartUBS light programmer that I have laying around. This one: mySmart USB lightThis programm
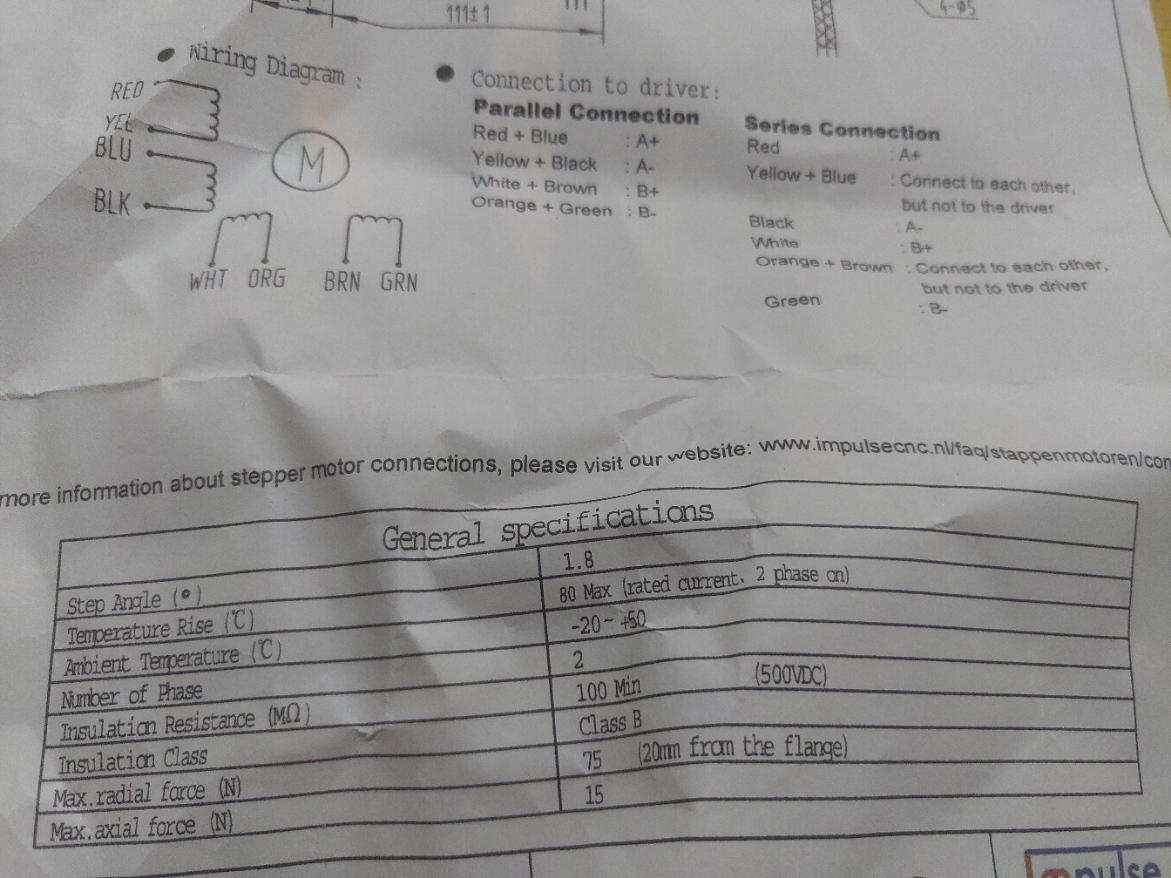
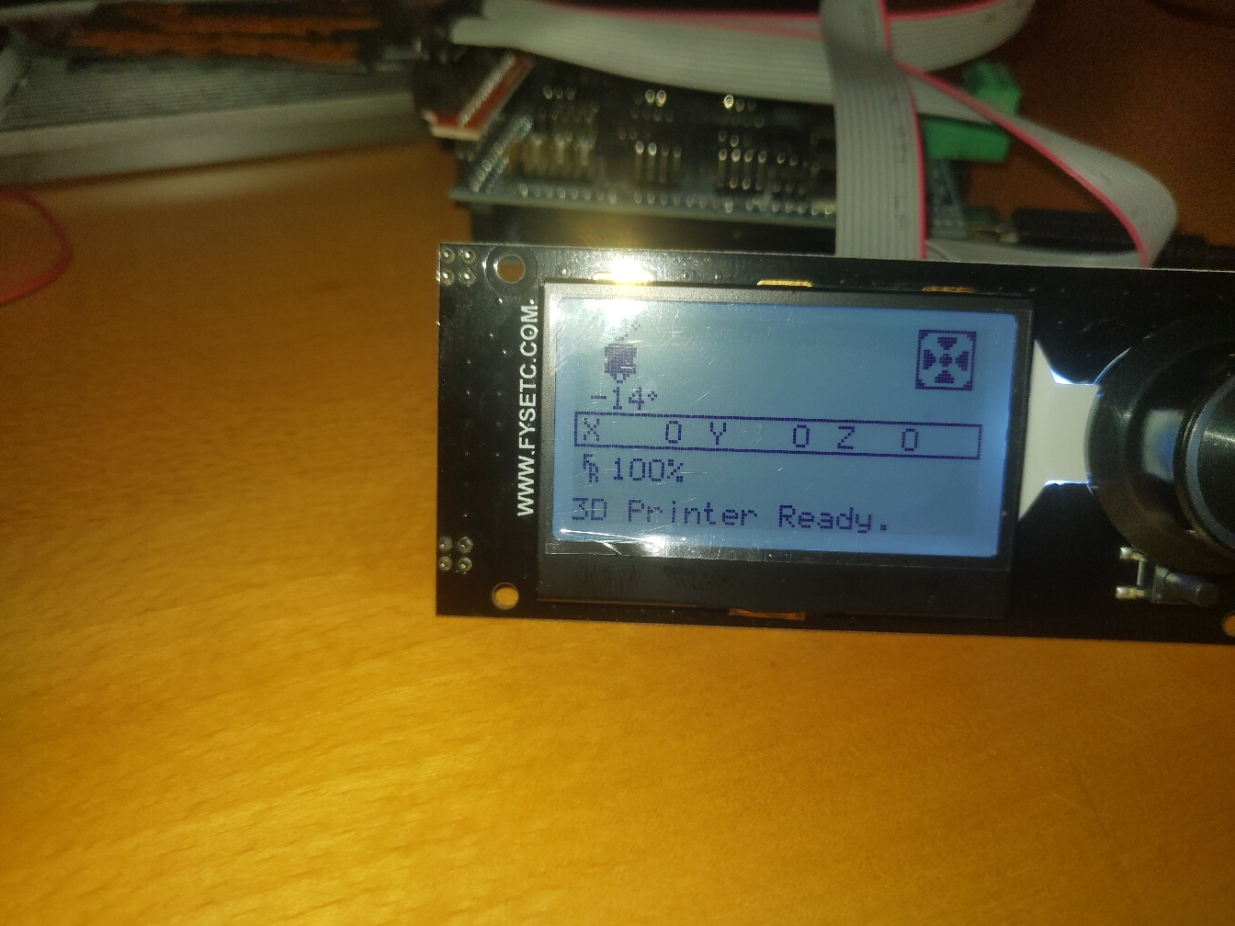
Electronics My Ramps 1.5 setup part II In this part [/ramps-and-leadshine-drivers/] I got the display and hardware programmed to work. So now it is time to get the motor running. The leadshin
Electronics My Ramps 1.5 setup I wanted to see if I could use the RAMPS board to drive my big-ass stepper motors via my lead shine drivers. So I ordered this cheap-ass ATmeaga2560:
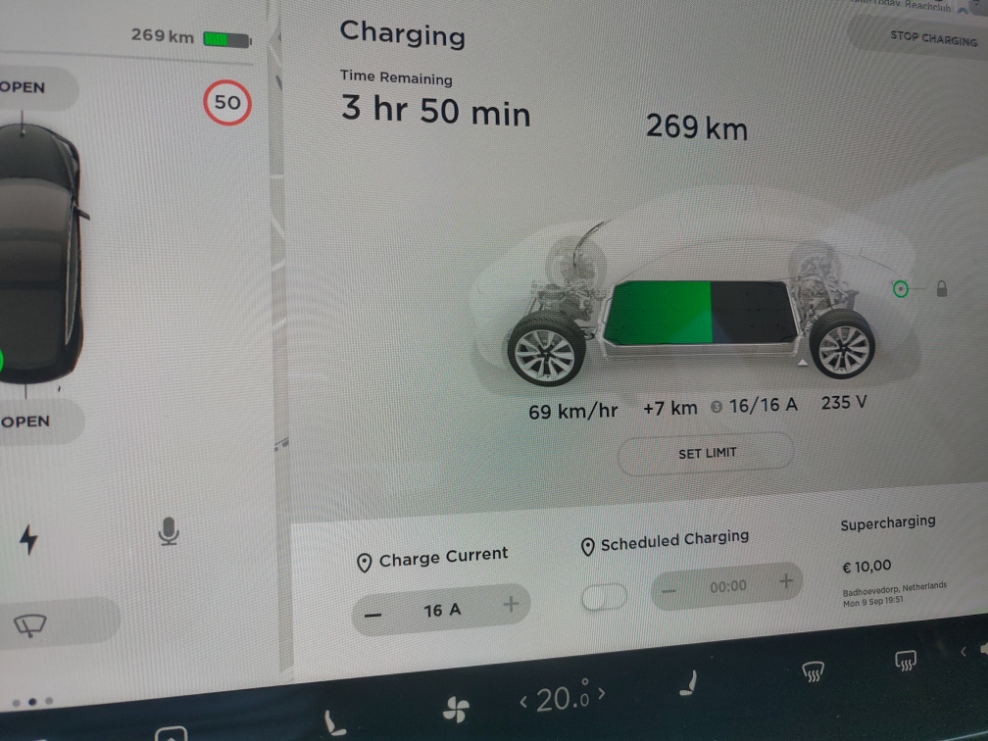
EV Testing my openEVSE on 3 phase I finally took delivery on my Model 3, 2 months late (don't get me started). And ofcourse one of the first things I wanted to try is charging it on my h
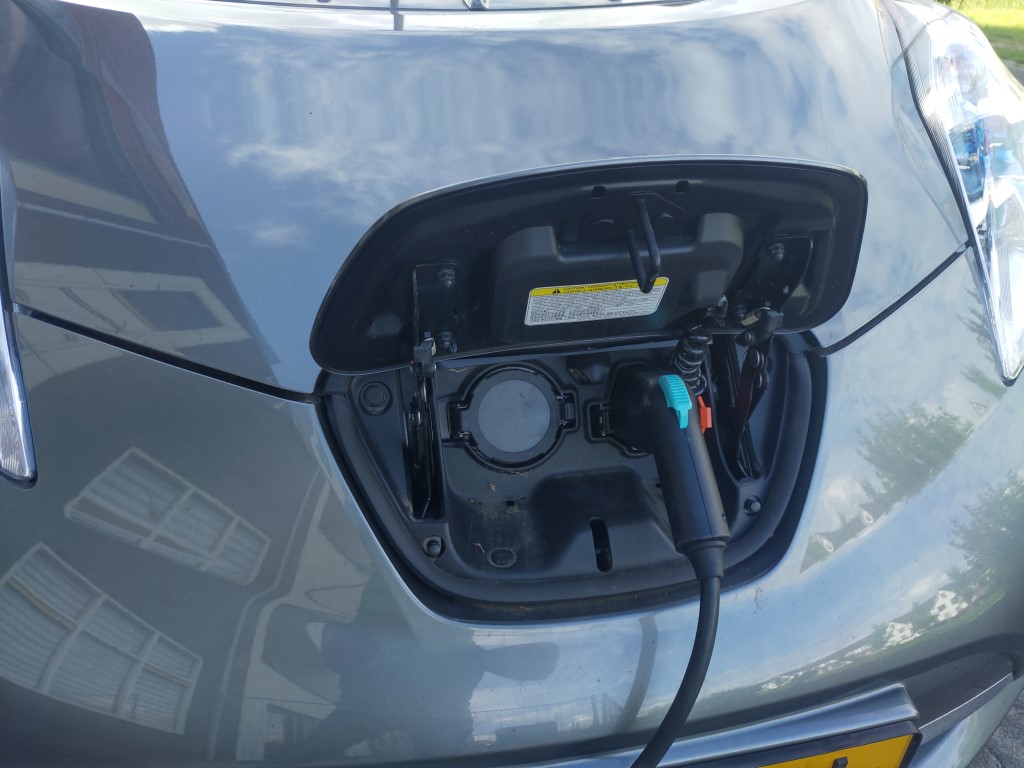
EV Real life testing my openEVSE My friend Quinten stepped by and since he owns a Nissan Leaf this was the perfect opportunity to really test my openEVSE. We set the amps to 16 and plug
EV Solving OpenEVSE display bug So.. after boot all seems fine with my openEVSE: But when it starts charging this happens: This comes from this this code: if (curstate == EVSE_S
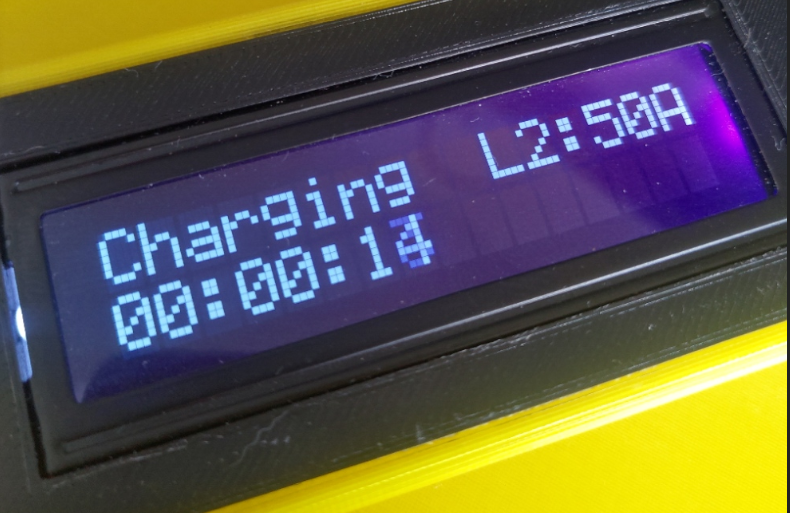
EV Bench testing my openEVSE It is time to bench test my Arduino openEVSE. So I uploaded my version of the firmware onto it and waited for the bootscreen. And sure enough: That l
EV Getting OpenEVSE firmware to compile With all the hardware for my openEVSE done, I started focussing on the software part. That is the openEVSE firmware. Because I only need the basic func
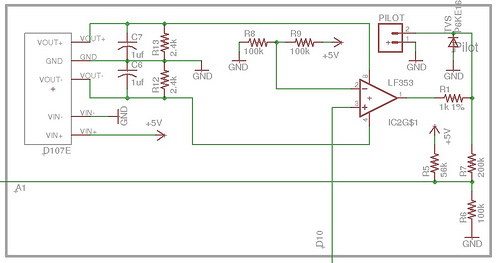
EV Populating OpenEVSE arduino shield With all components delivered, I started populating my OpenEVSE Arduino Shield. I'm just building these two circuits: one for switching the relay from p
EV Sourcing OpenEVSE components My plan is to build an OpenEVSE charger. I already prepped my cupboard [/prepping-the-meter-cupboard/] for it, and made an Arduino housing [/making-an-a
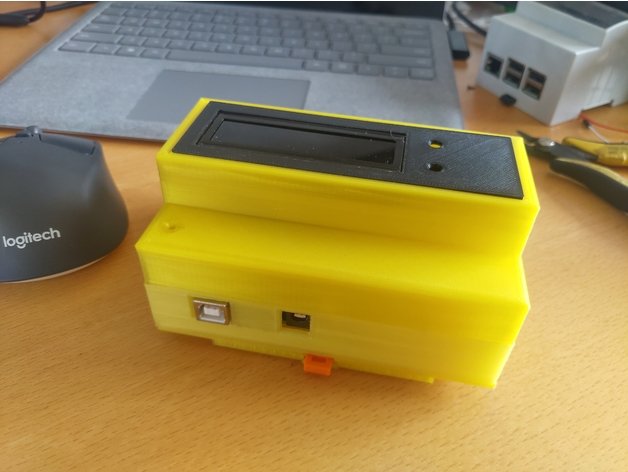
EV Making an Arduino DIN case For my EV charging project (first post here [/prepping-the-meter-cupboard/]), I will need a DIN case that will fit in my existing enclosure and will hol
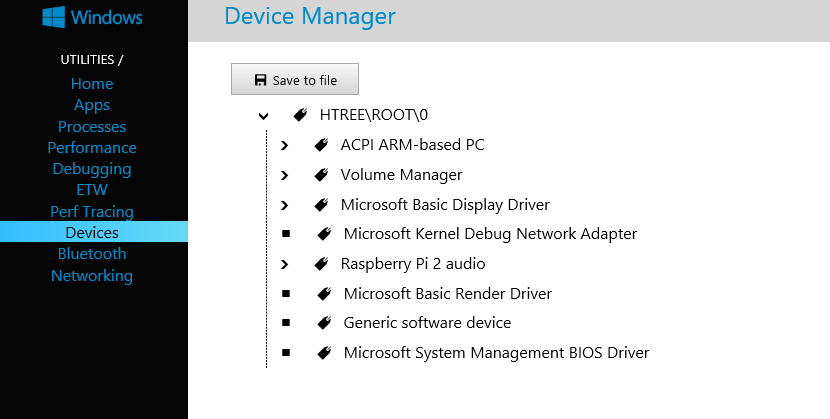
Electronics USB Serial on Windows 10 IoT core #3 This is a follow up on two earlier posts.. this [/usb-serial-on-windows-10-iot-core-2/] and this one [/serial-usb-on-windows-10-iot-core/] So I ordered
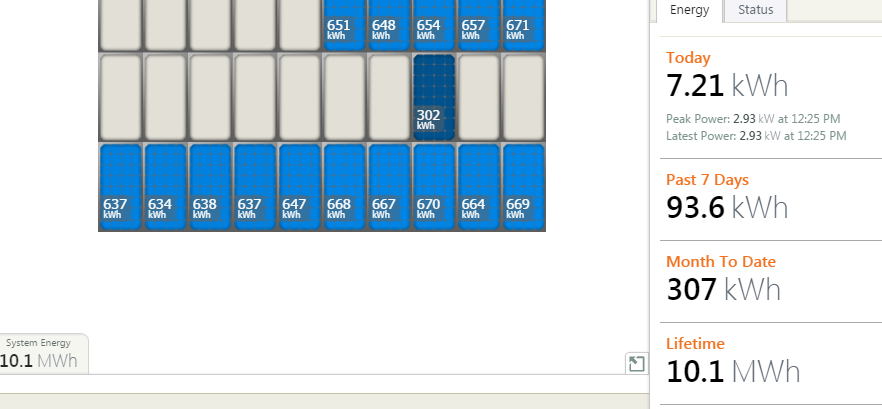
Electronics Solar milestone In two and a half years my solarpanels this week hit a milestone.. 10MWh of energy produced!! Thank you panels.
Electronics iPad works Received the new digitizer today, and connected it: And it works... Saved me a lot of money.. I am gonna order another just to keep on stock in ca
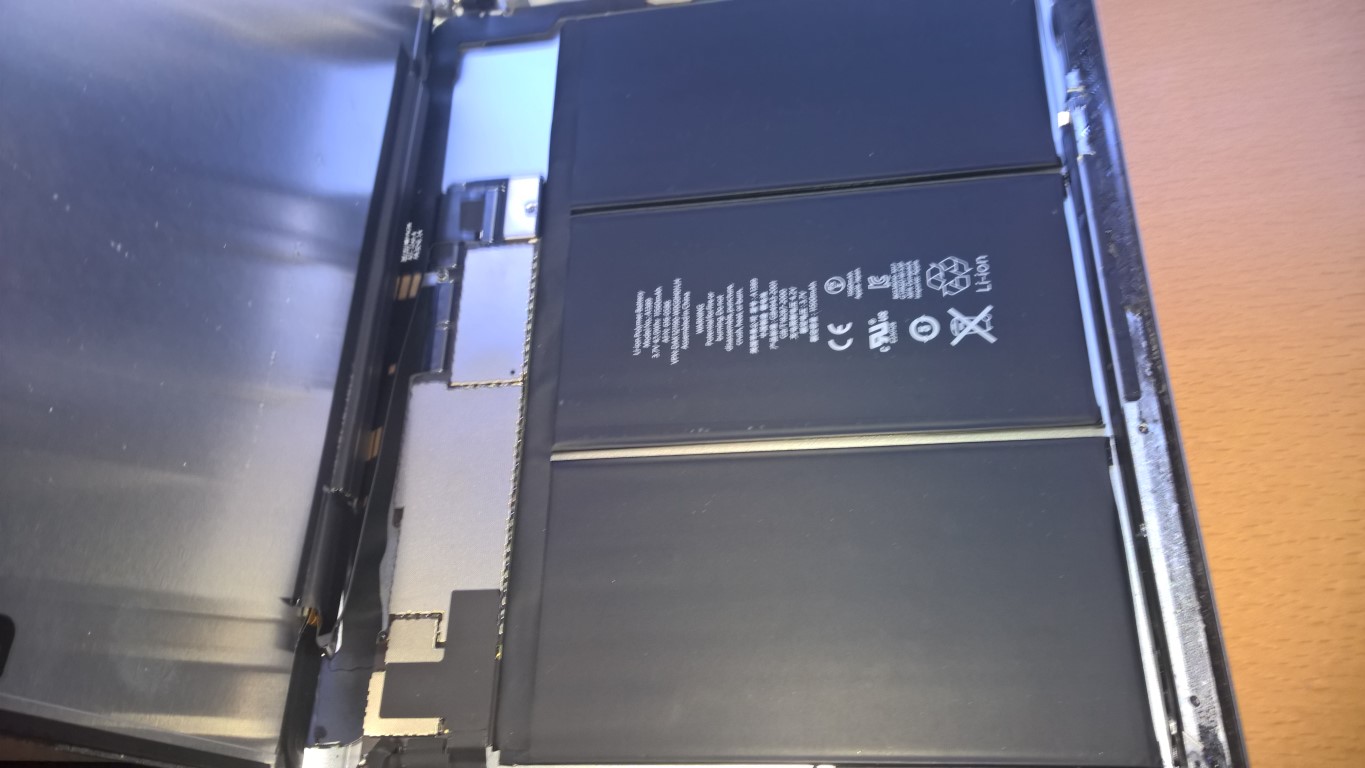
Electronics iPad digitizer So, my firstborn is using an iPad at school, and sure enough the glass of an iPad is not up to that: I've had it fixed before and this time I decided
EV Zonnepanelen geplaatst For the record, ik heb niet stil gezeten.. 16 Stuks Canadian Solar 235Wp panelen. Met Enphase micro inverters, dat is echt top spul:
Electronics SMD expiriment Ik heb besloten dat ik SMD printen wil kunnen maken.. dus even een testprintje gemaakt: En even voor de gein geprobeerd om dit met de hand te soldere
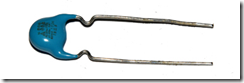
EV Oplossing Is dus een condensator: 1 uF is genoeg. Het stomme is dat m’n print hier op voorbereid is.. er is plek voor en de gaten zijn geboord. Alleen ik heb z
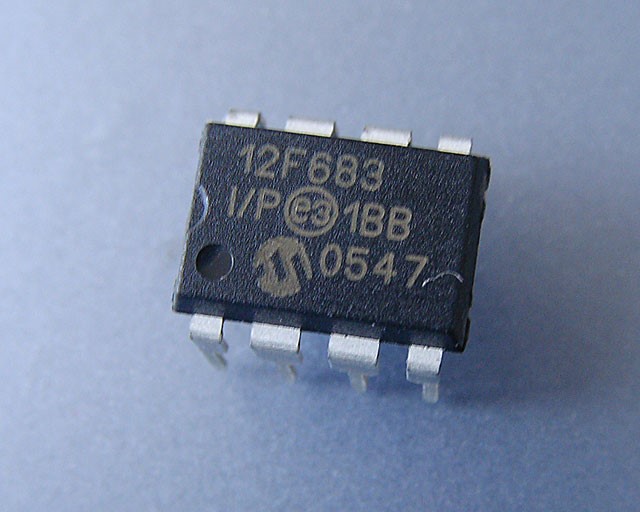
Electronics Ik snap het Dus.. ik snap het denk ik. Het probleem is dat de PIC12F683 een reset krijgt bij het UIT schakelen van de load. Dit moet bijna wel komen door een spann
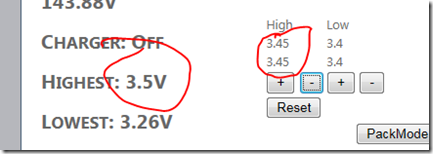
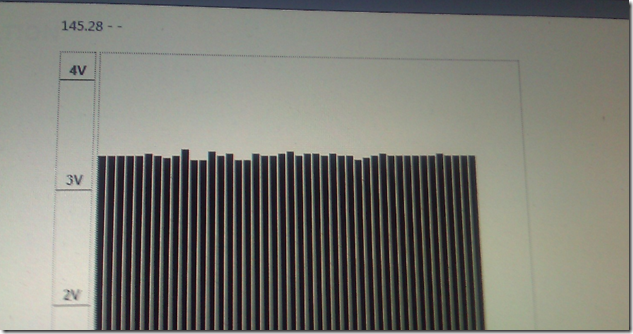
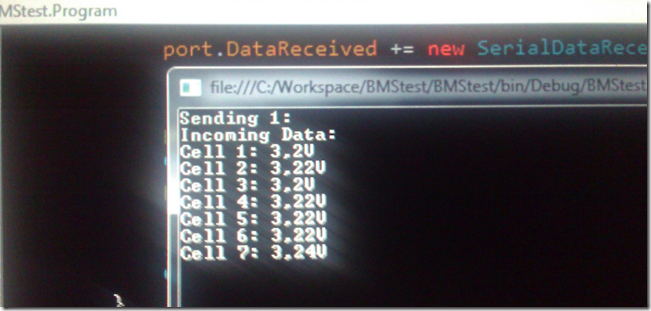
EV Ik snap het niet M’n BMS is online maar het gedrag kan ik nog helemaal verklaren en is ook nog niet goed. Ik heb een html5 canvas page die alle voltages laat zien en opt
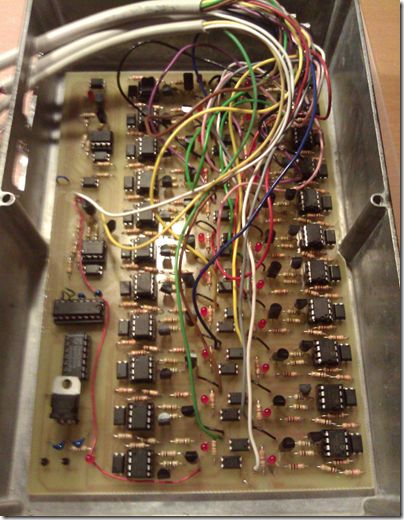
EV Tweede BMS module online Gesoldeerd en geklust.. de tweede BMS module: Links de eerste (met de rode leds) en rechts de tweede (met groene leds) samen kunnen ze 46 cellen moni
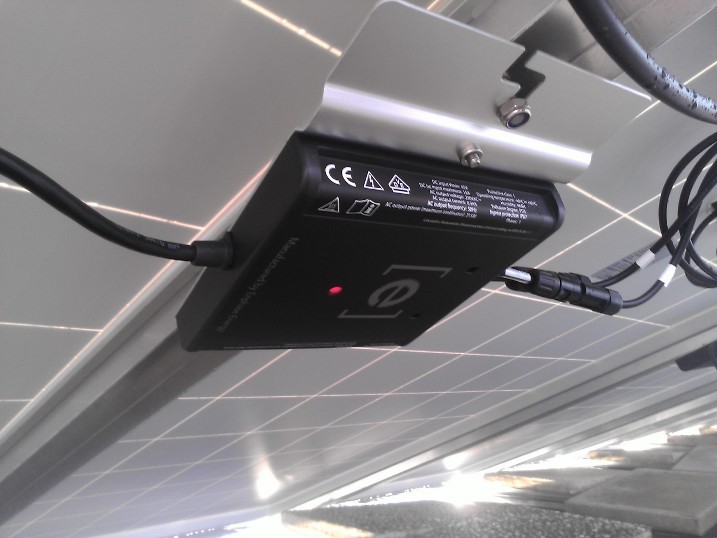
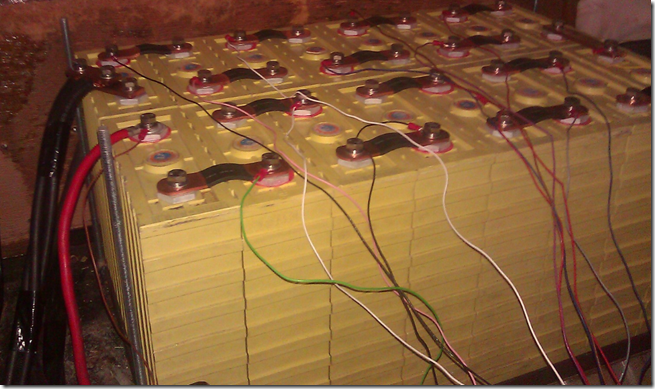
EV Eerste echte BMS module test Eerste BMS module op het battery pack aangesloten: De dunne draadjes gaan naar de BMS module: De pcb zit nu netjes in z’n kastje, alles zit vast e
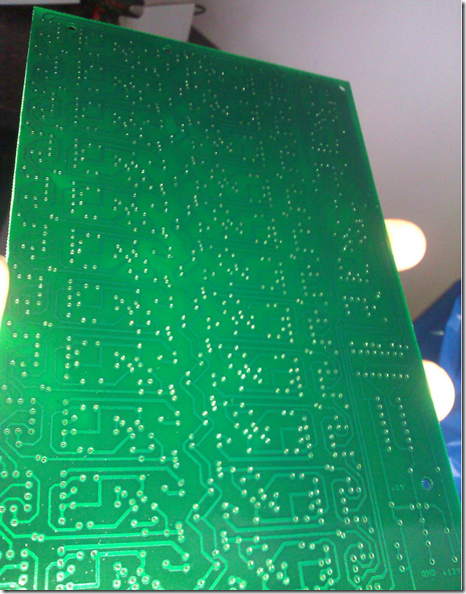
EV Groen is goed Spuitbus groene print beschermer en flux gekocht.. woohhh.. m’n printen zien er gelijk een stuk beter uit: Btw dit is het tweede BMS slaveboard.. sam
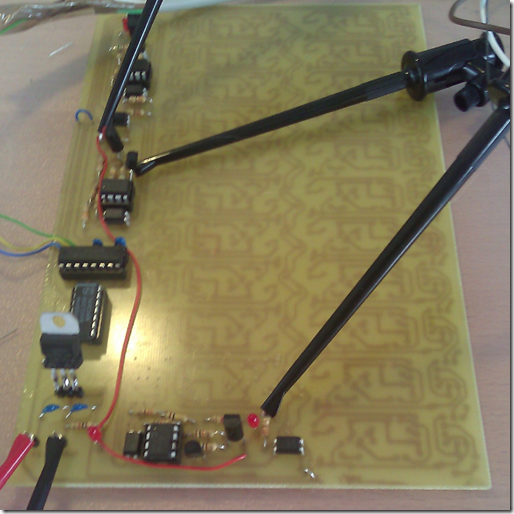
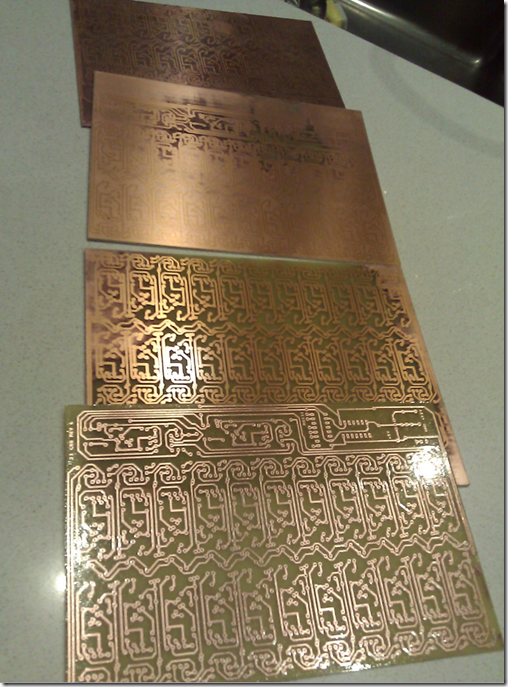
EV Vier keer = scheepsrecht Hmm.. ik ben het ontwikkelen en belichten van pcb’s verleerd. Het koste me vier pogingen om een goede print te krijgen: Dit is overigens de nieuwe BM
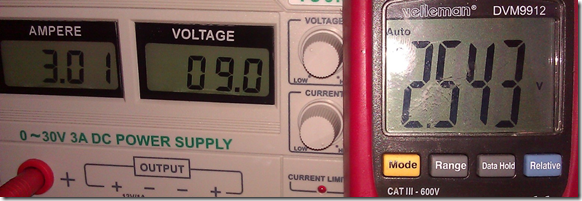
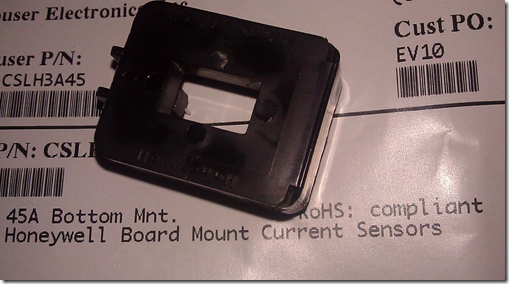
EV Testen met de CSLH3A45 Dat is die current sensor.. in de datasheet staat dit: Ik denk dat ie tussen de 15 en 22 mV per ampere varieert.. maar helemaal zeker weet ik het nie
EV Goodies part 878383 Kastjes voor de BMS printplaten: En een current sensor.. die wil ik ook gebruiken voor het BMS: Was de goedkoopste die ze hadden die tot 45A kan m
EV BMS verlelijkt De vermogens weerstanden op het BMS hebben een te lage waarde… 15Ohm geeft een ontlaad stroom van 0.2A en dat is te weinig. Deze heb ik vervangen voor 3
EV Nieuwe spullen voor BMS Ik ga de BMS slave boards op een groter PCB maken.. dan kunnen er meer op (24 ipv 16) en kan ik extra controle electronica plaatsen. Spullen zijn gedeel
EV BMS dan Maar even afgemaakt (voor 9 cellen dan).. en aan gesloten.. ziet er er zo uit: Het BMS in actie: Voor: Na: Werkt TOP dus.. heeft nog wel wat
EV BMS en pack emulator Eindelijk meet cell modules gesoldeerd op m’n BMS Pcb.. en om te testen had ik m’n eerder gemaakte pack emulator nodig: Aangesloten over rs232 aan m’
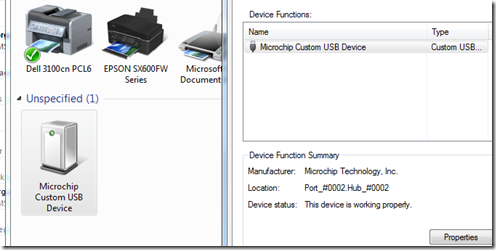
Electronics Het coolste beunsoldeersel tot nu toe Is dit: Het is een USB.. tja.. nog niets totdat ie goed geprogrammeerd wordt eigenlijk.. dat is de volgende stap.. voorlopig doet ie dit: Dat is h
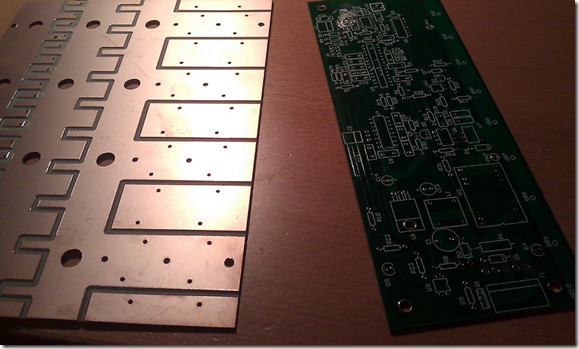
EV Pcb’s binnen Ik heb de PCB’s van Paul Holmes binnen.. De linker is het powerboard en de rechter dus het controller board. Draait allemaal op een ATMega168, daarvo
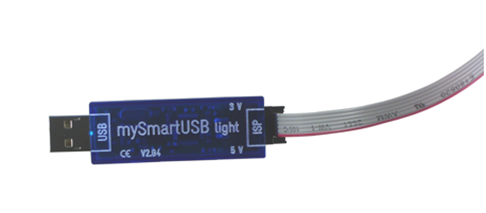
EV Nieuw tooltje binnen Uit Duitsland deze keer. Het is een AVR programmer, voor het programmeren van ATMega microprocessoren: De processoren heb ik nog niet binnen, maar we
EV PCB maken Dus.. een print maken.. ik ga het zelf doen, heb het eerder gedaan dus moet lukken. Het maken van een printplaat bestaat uit de volgende stappen: * Pr
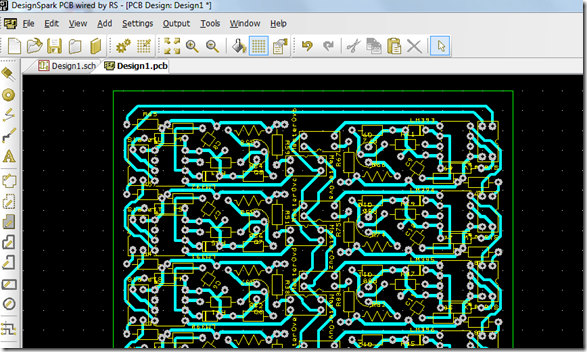
EV Board ontwerp klaar Ik heb het schema van de battery slave module omgezet tot een printplaat. Er passen nu 16 slaves op een euroboard van 10x16cm en hij is enkelzijdig.. I
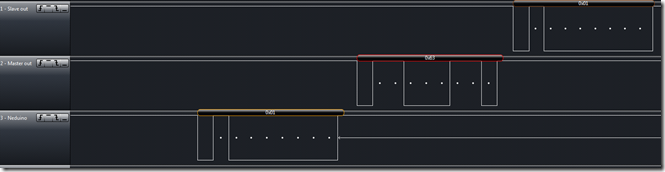
Electronics Netduino en slaveboard communicatie Dat de breadvoard versie van m’n slaveboard werkt kon ik alleen nog bewijzen met de logic analyser. Doel was natuurlijk om deze te laten communiceren me
EV Eerste slave ‘bread’ board werkt Ik heb op een breadboard m’n eerste battery slave gebouwd. De PIC 12F683 heb ik geprogrammeerd met de code van Peter Perkins. De werking kan makkelijk g
Electronics Logic analyser Is een cool device… geeft de mogelijkheid om van 8 verschillende kanalen de digitale informatie in te zien en te analyseren. Ik heb er 1 besteld: Moe
Electronics BSF BCF GOTO ? Ja huh.. volgende stap is natuurlijk het programmeren van die PIC12F683. Ik dacht dat de bijgeleverde software een C compiler zou hebben, ik dacht daar
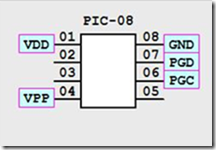
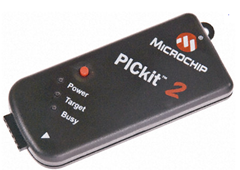
EV PIC12F683 connecten met de PICKIT2 Ik heb alle spullen binnen, de PICKIT2 programmer en de PIC12F683 microcontrollers. Het is niet zo dat je de IC’s gewoon op die porgrammer kan klikken,
EV Fan gekoppeld aan m’n netduino driver Ik heb als soort van motor een 12V fan aan m’n netduino driver gehangen.. werkt prefect.. kan de snelheid met de potmeter bepalen is alleen op de video
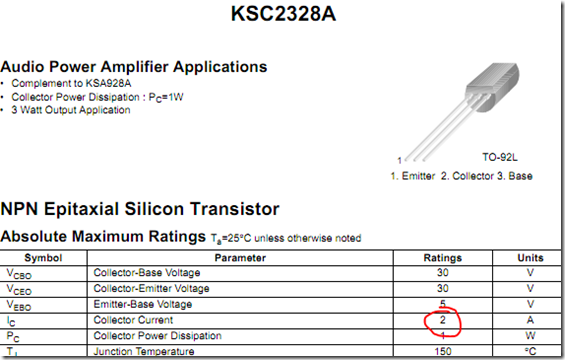
Electronics BMS componenten Ik ga m’n BMS maken met een microcontroller per cell. De 12F683 om precies te zijn: Om er software in te krijgen heb je een programmer nodig. De PICK
EV Seriele communicatie met de netduino In mijn BMS moet ik per accu een mini boardje bouwen, en deze boardjes moeten communiceren met een centrale unit, om hun status door te geven enzo. Ser
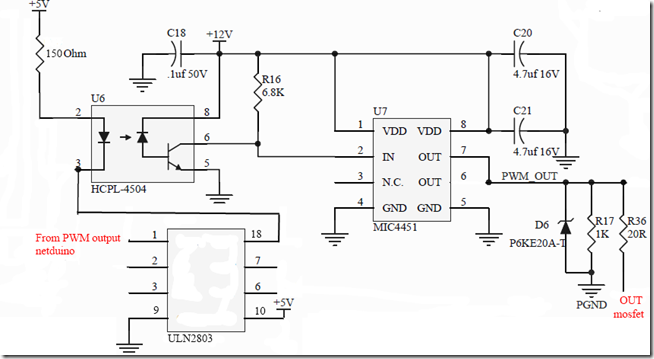
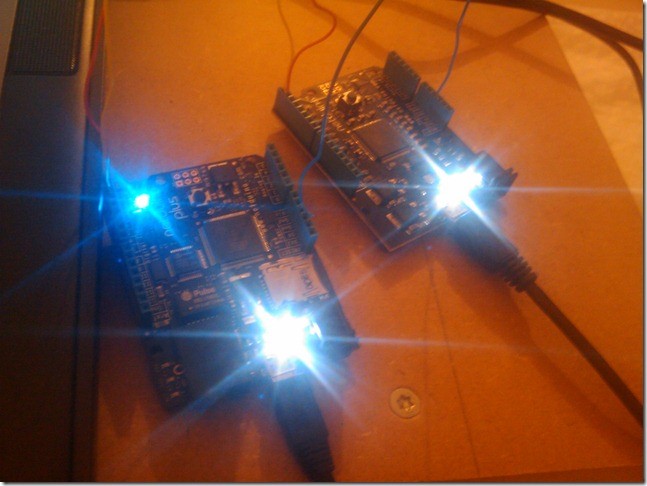
Controller Netduino als dimmer Het werkt.. m’n driver circuit. Ik heb er een uln2803 voorgezet omhet 3.3V signaal (en 10mA) van de netduino PWM output te versterken tot de 23mA die d
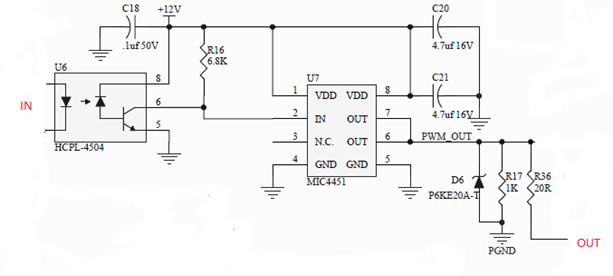
Controller Geleerd over hcpl 4504 Dat is de optocoupler in m’n driver circuit. Er bestaan blijkbaar verschillende datasheets van (over verschillende versies van het ding zelf), maar de d
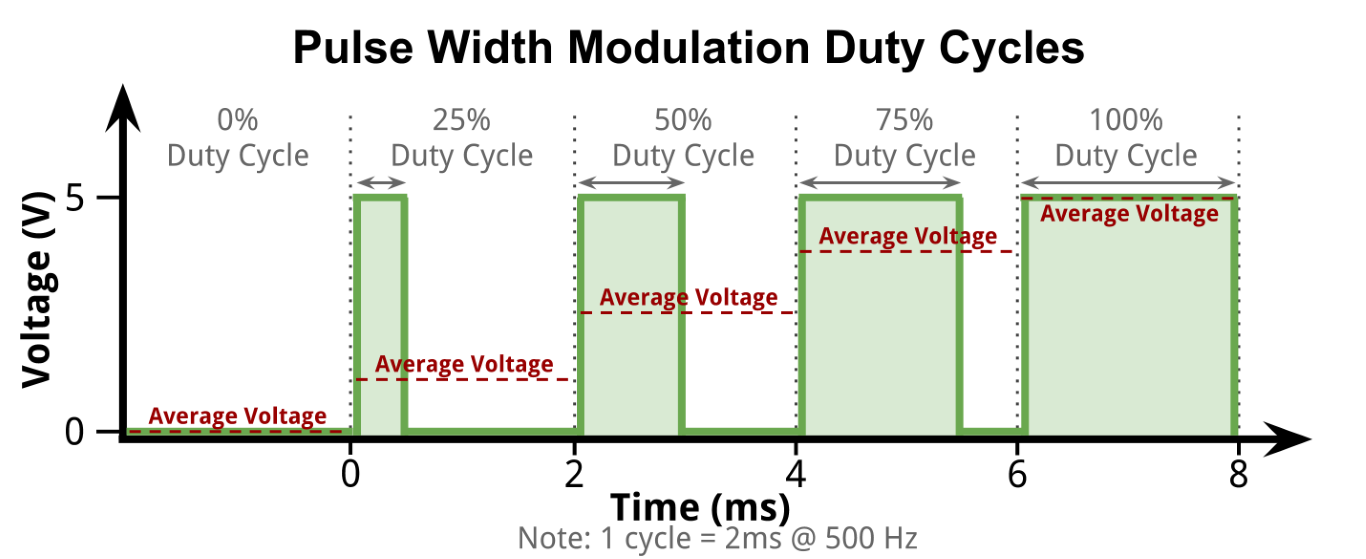
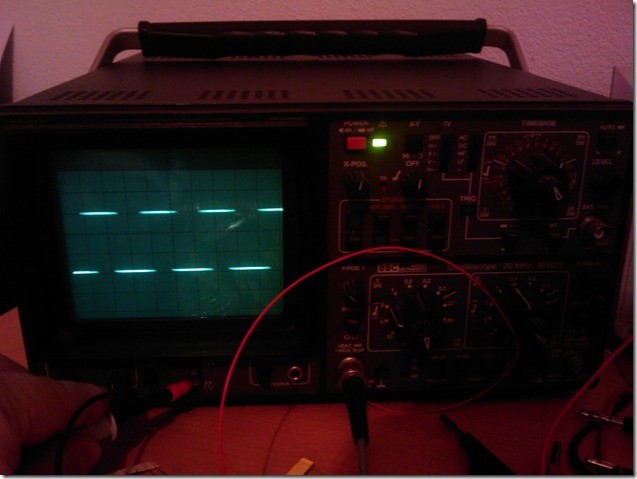
EV PWM output sturen met potentiometer op netduino Nu ik een scoop heb kan ik echt gaan testen met de PWM output van de netduino. Dit is de code: > public class Program { static PWM pwm = new PWM(Pins.G
EV Componenten voor driver Voor het circuit wat een mosfet wel goed zou moeten kunnen aansturen (zie hier [http://blog.evombouw.nl/post/Mosfet-driver-schema.aspx]) heb ik nu ook d
Electronics Kerstmis is vroeg dit jaar.. Ik kreeg vandaag een pakje met de koerier uit de USA… Chris Walker (van de Netduino) had me vorige week om m’n adres gevraagd om iets op te sturen als d
EV Mosfet driver schema Ik ga het schema van de open revolt controller (zie hier [http://ecomodder.com/wiki/index.php/Open_ReVolt]) kopieren voor het sturen van m’n mosfet(s):
EV Magic smoke Ik dacht ik ben bijna klaar.. ik kan power sturen met de netduino, ik gebruik de PWM poort (ipv gewone digitale out) om die mosfet driver te sturen en i
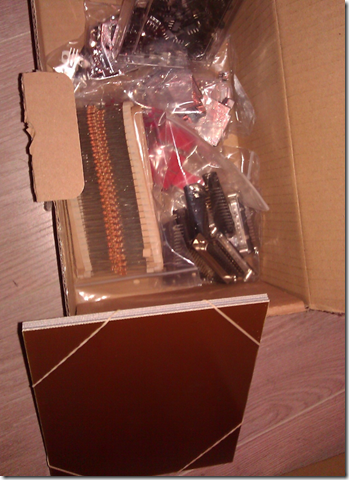
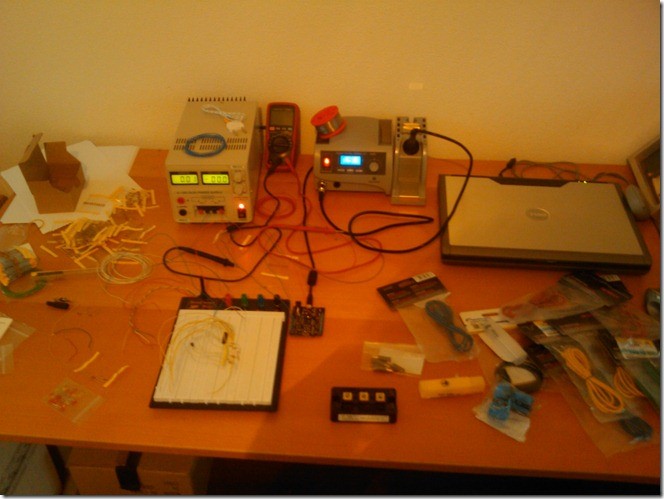
EV Nieuw in het lab Nieuwe zendingen binnengekomen. Nieuwe soldeerbout, heel veel meetsnoeren, mosfets, mosfet drivers, soldeer, klemmetjes.. vanalles. En op de voorgrond
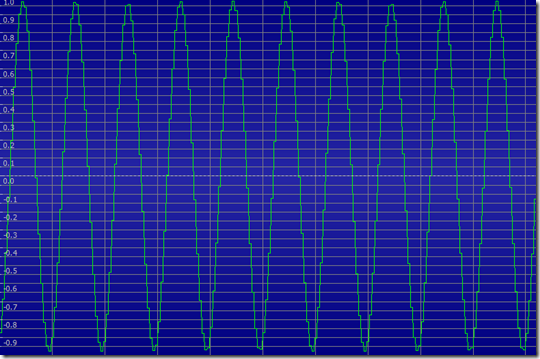
Electronics Scoop Heb ik even gemaakt.. twee weerstanden aan een 3.5 jackplug gehangen. Die vervolgens aan de soundcard van m’n notebook gehangen en goldwave opgestart.
EV Meer spullen Weer wat meer electronica beunspullen besteld. Meetkabels, een nieuwe soldeerbout, condensatoren, mosfets en mosfet drivers.
Electronics Leds aansturen met analoge input op netduino 8 Leds aangesloten op 8 digitale outputs van de netduino met een driver daarvoor: uln2803 Besturing gebeurd door potentiometer op analoge ingang, resul
Electronics 5V vs 3.3V Problem solved. Je kan wel 5V op de Aref (analoge referentiespanning) van de netduino zetten, en dan 0-5V op de analoge ingang meten, maar dat heeft ge
Electronics Spullen binnen Ik heb m’n breadboard enzo allemaal binnen. Gelijk een projectje gemaakt met de potentiometers. Ik meet met m’n multimeter van 0.05V tot 5.00V als ik e
Electronics Netduino performance meten Klein programmatje geschreven voor de netduino: public static void Main() { long start = DateTime.Now.Ticks; for (int i = 0; i < 2500; i++) { analogVa
Electronics Componenten bestelling Ik moet nog een voeding en een scoop hebben.. maar de rest heb ik alvast besteld:
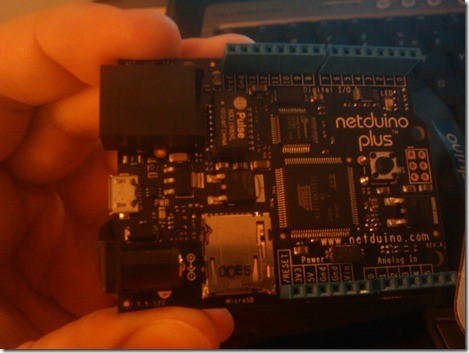
Electronics Netduino Ik heb ook de netduino binnen. Alleen als ik iets met PWM wil doen heb ik natuurlijk een scoop nodig. Volgende missie: Scoop scoren.